As a trusted supplier of Plastic Flowmeters, I understand the importance of maintaining the performance and longevity of these devices. Regular cleaning is a crucial aspect of this maintenance, ensuring accurate measurements and preventing potential issues. In this blog post, I'll share a comprehensive guide on how to clean a plastic flowmeter, drawing on my experience in the industry.
Understanding Your Plastic Flowmeter
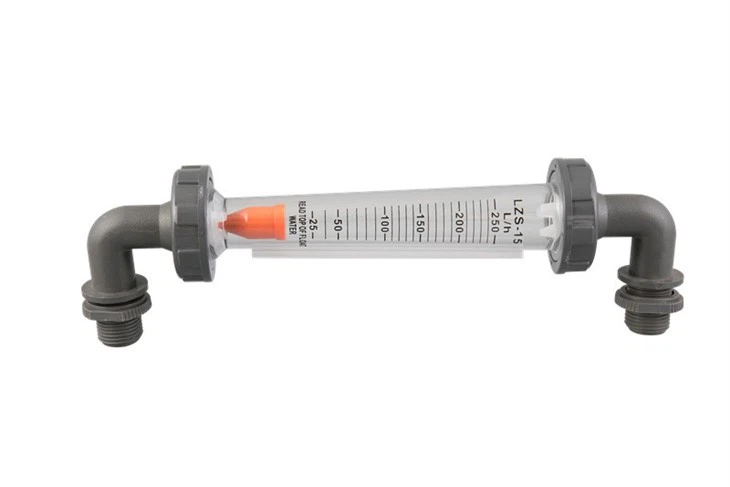
Before you start cleaning, it's essential to understand the type of plastic flowmeter you have. Different models may have unique features and requirements. For instance, our Z-500E (Elbow) Series Plastic Flowmeters are designed with an elbow configuration, which may require special attention during cleaning. The LZS Series has its own set of components and materials that need to be considered, and the same goes for the Z-500V (Valve) Series Plastic Flowmeters.
Preparation
- Gather Your Tools: You'll need a few basic tools for the cleaning process. These include a soft brush, such as a toothbrush or a small paintbrush, mild detergent, clean water, a clean cloth, and a container for soaking.
- Safety First: Ensure that the flowmeter is disconnected from the power source and the fluid supply. Wear appropriate safety gear, such as gloves and goggles, to protect yourself from any potential contaminants.
- Read the Manual: Refer to the user manual that came with your flowmeter. It will provide specific instructions and precautions for cleaning your particular model.
Disassembly (if required)
Some plastic flowmeters may need to be disassembled for a thorough cleaning. However, this step should only be done if you're confident in your ability to reassemble the device correctly.
- Identify the Components: Carefully examine the flowmeter to identify the parts that can be removed. These may include the housing, the measuring element, and any valves or connectors.
- Use the Right Tools: Use the appropriate tools to remove the components. Avoid using excessive force, as this could damage the plastic parts.
- Keep Track of the Parts: As you remove the components, lay them out in an organized manner or place them in a labeled container. This will make reassembly easier.
Cleaning the Components
- Soaking: Fill the container with a solution of mild detergent and clean water. Submerge the removable components in the solution and let them soak for a few minutes. This will help to loosen any dirt, debris, or residue.
- Brushing: Use the soft brush to gently scrub the components. Pay special attention to the areas where dirt and debris are likely to accumulate, such as the measuring element and the inside of the housing.
- Rinsing: After brushing, rinse the components thoroughly with clean water to remove any remaining detergent and debris.
- Drying: Use a clean cloth to dry the components. Make sure they are completely dry before reassembling the flowmeter.
Cleaning the Non-Removable Parts
If there are parts of the flowmeter that cannot be removed, you can still clean them using a damp cloth and mild detergent.
- Wiping: Dampen the cloth with the detergent solution and gently wipe the non-removable parts. Be careful not to get the cloth too wet, as this could damage the electrical components.
- Avoid Abrasive Materials: Do not use abrasive materials or harsh chemicals to clean the plastic parts, as these can scratch or damage the surface.
Reassembly
- Check for Damage: Before reassembling the flowmeter, inspect the components for any signs of damage. If you notice any cracks, chips, or other damage, replace the damaged parts.
- Follow the Manual: Refer to the user manual for the correct order of reassembly. Make sure all the components are properly aligned and tightened.
- Test the Flowmeter: Once the flowmeter is reassembled, reconnect it to the power source and the fluid supply. Test the flowmeter to ensure that it is working properly.
Regular Maintenance
Cleaning your plastic flowmeter is not a one-time task. Regular maintenance is essential to keep the device in good working condition.
- Establish a Cleaning Schedule: Depending on the usage and the environment, establish a regular cleaning schedule. This could be monthly, quarterly, or annually.
- Inspect the Flowmeter: During the cleaning process, take the opportunity to inspect the flowmeter for any signs of wear or damage. Replace any worn or damaged parts as soon as possible.
- Keep Records: Keep a record of the cleaning and maintenance activities. This will help you to track the performance of the flowmeter and identify any potential issues.
Troubleshooting
If you encounter any problems during the cleaning or maintenance process, here are some common issues and solutions:
- Clogging: If the flowmeter is clogged, check the measuring element and the valves for any blockages. Use the soft brush to remove any debris.
- Leaking: If the flowmeter is leaking, check the seals and gaskets for any damage. Replace the damaged seals and gaskets.
- Inaccurate Readings: If the flowmeter is giving inaccurate readings, check the calibration. Refer to the user manual for instructions on how to calibrate the flowmeter.
Conclusion
Cleaning a plastic flowmeter is a relatively simple process that can have a significant impact on its performance and longevity. By following the steps outlined in this guide, you can ensure that your flowmeter is clean, accurate, and reliable.

If you're in the market for high-quality plastic flowmeters or need further assistance with cleaning and maintenance, we're here to help. Our team of experts can provide you with the best solutions for your specific needs. Contact us today to start a conversation about your procurement requirements.
References
- Manufacturer's user manuals for Z-500E (Elbow) Series Plastic Flowmeters, LZS Series, and Z-500V (Valve) Series Plastic Flowmeters.
- Industry best practices for cleaning and maintaining plastic flowmeters.


